Some K2 problems look far more serious than they are. K2 rarely tells you what has actually gone wrong, so a fix that takes under a minute can cost you an afternoon of looking. These five are written for K2 administrators and the people running workflows day to day. Nothing here needs server access or a support ticket.
If your organisation runs Nintex K2, the pattern in your support queue is probably familiar. A user cannot start a workflow. An instance is impossible to find in a list of numeric IDs. A Designer search returns everything except the thing you were looking for. None of these are faults in the platform, and none of them need a developer. They need somebody who knows where to look.
The five below are the ones our K2 team gets asked about most often, in roughly that order. They are worth knowing whether you are a citizen developer taking your first steps in K2 or the person your colleagues come to when something looks broken. Each one takes under a minute to do.
This is the single most common ticket that we receive. A user tries to start a workflow, gets blocked, and the immediate assumption is that something is broken.
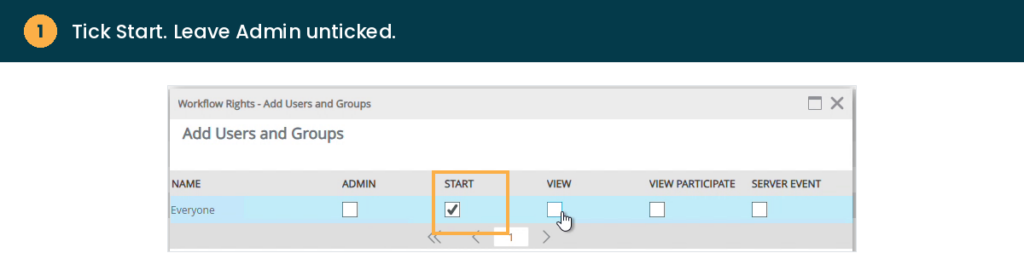
Nothing is broken. When a workflow is deployed, only the person who deployed it is automatically given rights to it. Everyone else has to be granted rights manually, and the right they usually need is Start.
The workflow now shows Everyone with Start set to true in the Rights list, and users can start it themselves without a ticket.
An instance sitting in Error status looks alarming, and the instinct is to open the workflow and start hunting for the fault. Often there is no fault. Many K2 errors are transient, caused by something like a temporary connection issue rather than a problem with the workflow logic.
If the cause was temporary, the instance clears from the Errors list and carries on running, with no changes to the workflow at all.
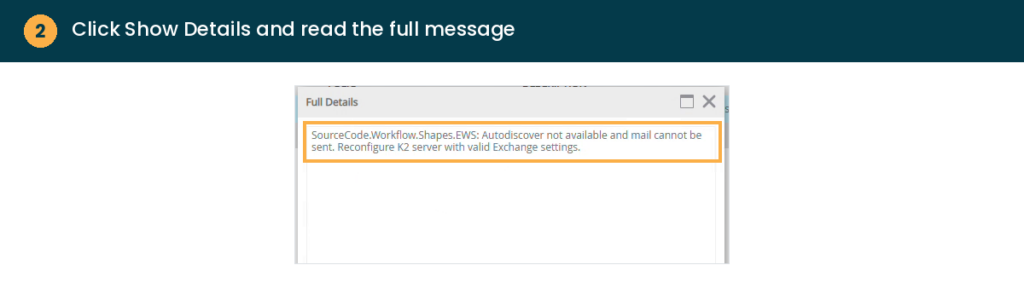
If the same error returns after a retry, that is your signal it is a real issue, for example a service that is misconfigured or consistently unreachable. That is the point to investigate properly, or to raise it with your K2 partner, ideally with the Show Details text to hand.
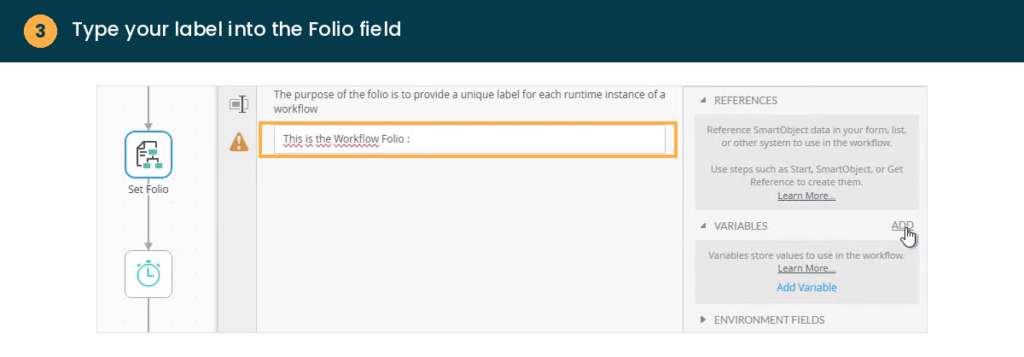
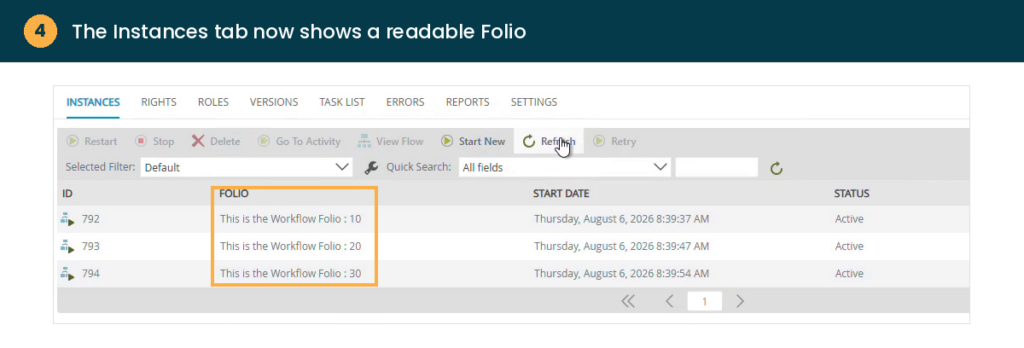
If you have ever tried to find one specific instance in K2 Management using nothing but a numeric ID, you already know why this matters. Folio is a short, free text label you can set on an instance, and it can combine static text with live data from the workflow itself.
From then on, the Instances tab in K2 Management shows that label in the Folio column instead of an ID. Combined with Quick Search, it makes finding, discussing and troubleshooting a specific instance far faster, both for your team and for whoever is helping you support it.
Worth adding to every new workflow as a matter of habit. Adding it later only labels the instances that start after the change, so the earlier it goes in, the more of your history is readable.
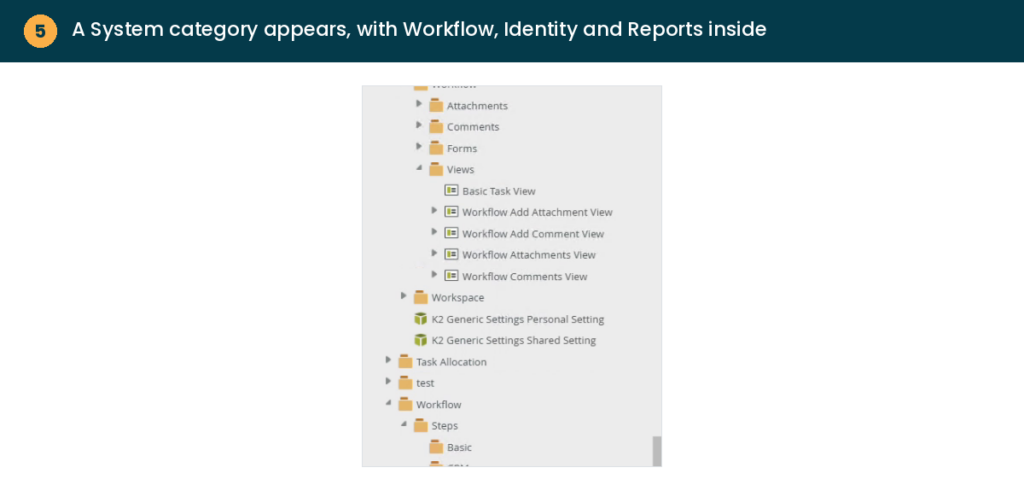
By default, Designer search and Browse only show you what has been built for your own solutions. K2 also ships with a large set of native, built in SmartObjects, things like Process Instance, Process Data and Activity Instance, which sit under a System category that stays hidden until you switch it on.
One thing to know before you go looking. These system SmartObjects cannot be edited directly. Open one and you will see Save As, Design a new view and Generate a view, but no Edit option, because K2 itself owns and maintains them. If you need to adapt one, save a copy first rather than trying to change the original.
They are most useful for building custom reports on workflow and process data without having to recreate that structure yourself.
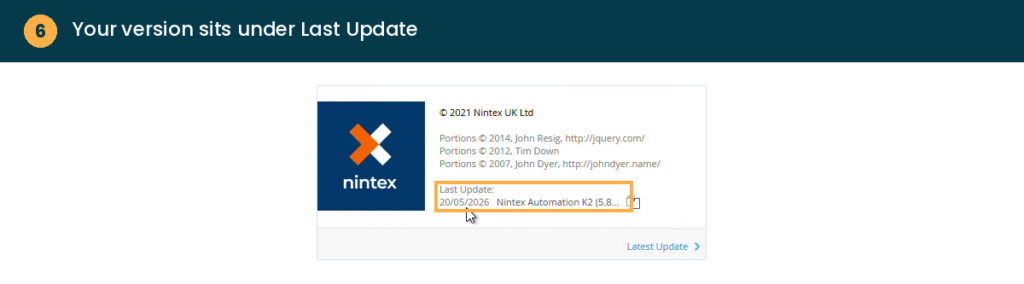
Knowing your exact version matters more than it sounds. It decides which behaviour you should expect when you compare one environment against another, and it is the first thing your K2 partner will ask you. You do not need to open K2 Management or find an administrator.
Ten seconds, no admin access required.
Three technologies that K2 relies on reach end of support between October and November 2026, and the right response depends entirely on the version you are running. Versions 5.7 and earlier will not receive new fix packs at all. If you have not checked your version recently, check it now, then read our guide to the 2026 end of support dates.
None of this is complicated once you have seen it done. It is the kind of knowledge that normally travels informally, from one K2 developer to the next, and leaves the organisation when they do. If your team keeps hitting the same small snag, write it down and share it rather than raising the same ticket every time.
If the same tickets keep arriving anyway, the gap is usually in enablement rather than in the platform. As a Nintex Premier Partner, AMO supports K2 estates from upgrades and fix packs through to training your own team, so fewer of these questions need to leave the building.