Style Profile in Nintex Automation (K2) provides an effective way to customise the look and feel of your Nintex K2 applications, resulting in a more seamless and personalised user experience. With Style Profiles, you can tailor the visual aspects of your applications to match your brand identity or meet specific design specifications. In this blog post, I will walk you through the process of creating a Basic, Intermediate and Advanced Style Profile that will enable you to easily customise the appearance of your applications.
Before diving into the creation process, let’s briefly discuss what Style Profiles are in the context of Nintex K2. A Style Profile is a collection of settings that define the visual appearance of Nintex K2 applications. These settings encompass design for various elements such as colours, fonts, spacing, and other styling attributes. By configuring a Style Profile, you can achieve consistency across your applications and ensure a cohesive user experience.
There are 3 levels of creation of Style Profile:
Let’s dive in…
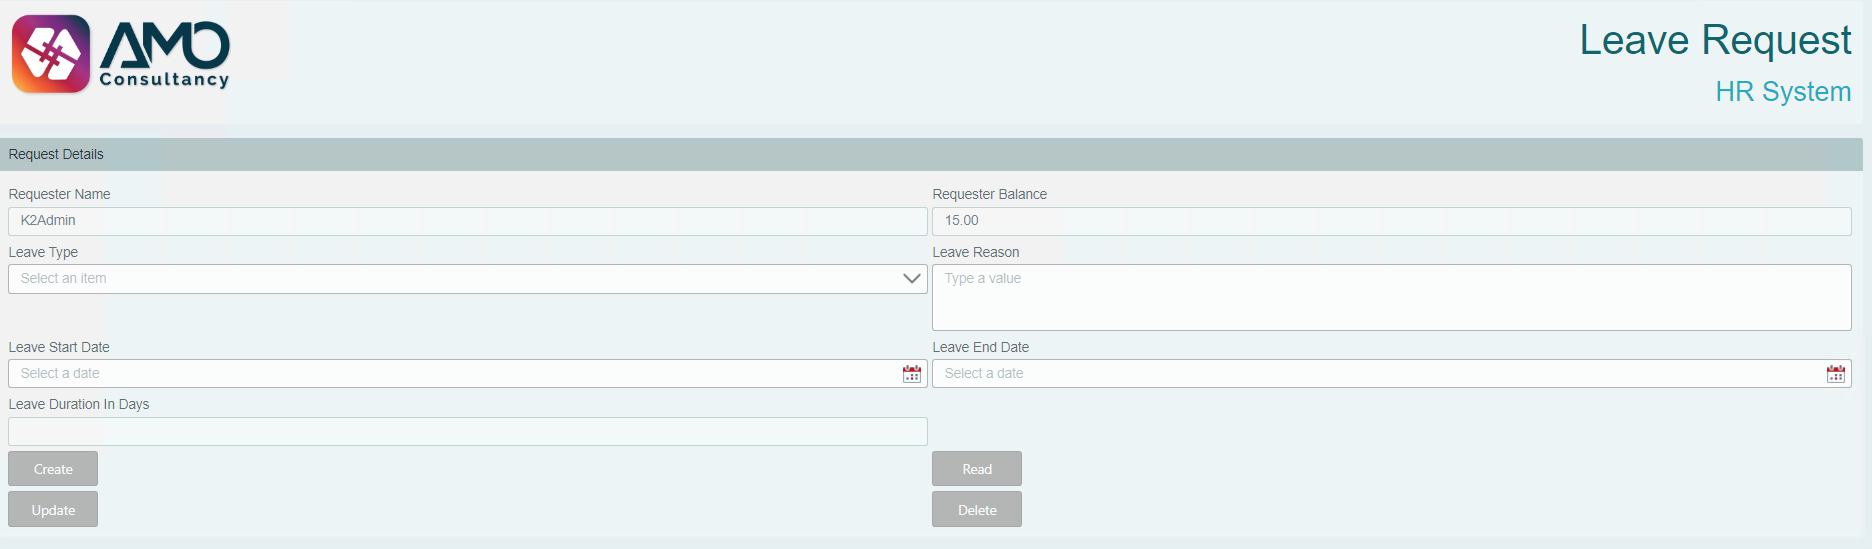
Follow these steps to create a basic Style profile in Nintex K2 Five:
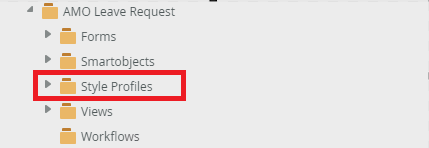
Under your project folder, create a folder and name it Style Profiles
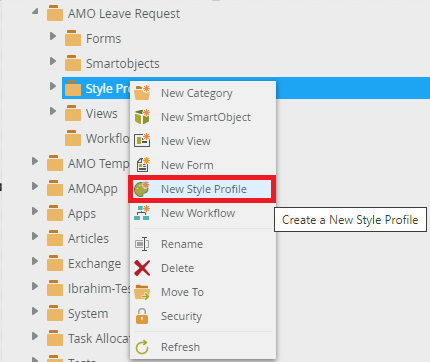
Right-click on the folder you created in step 1 and choose New Style Profile
Name your new Style Profile My Basic Style Profile (number 1 on below screenshot)
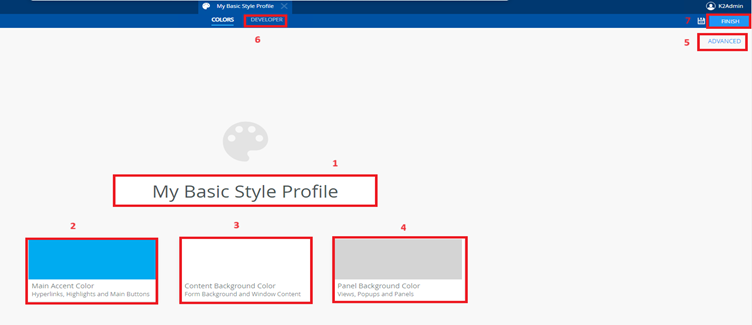
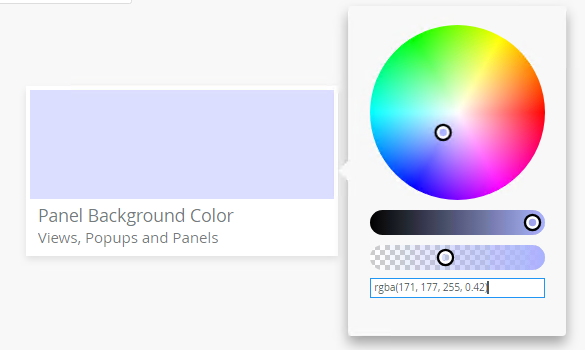
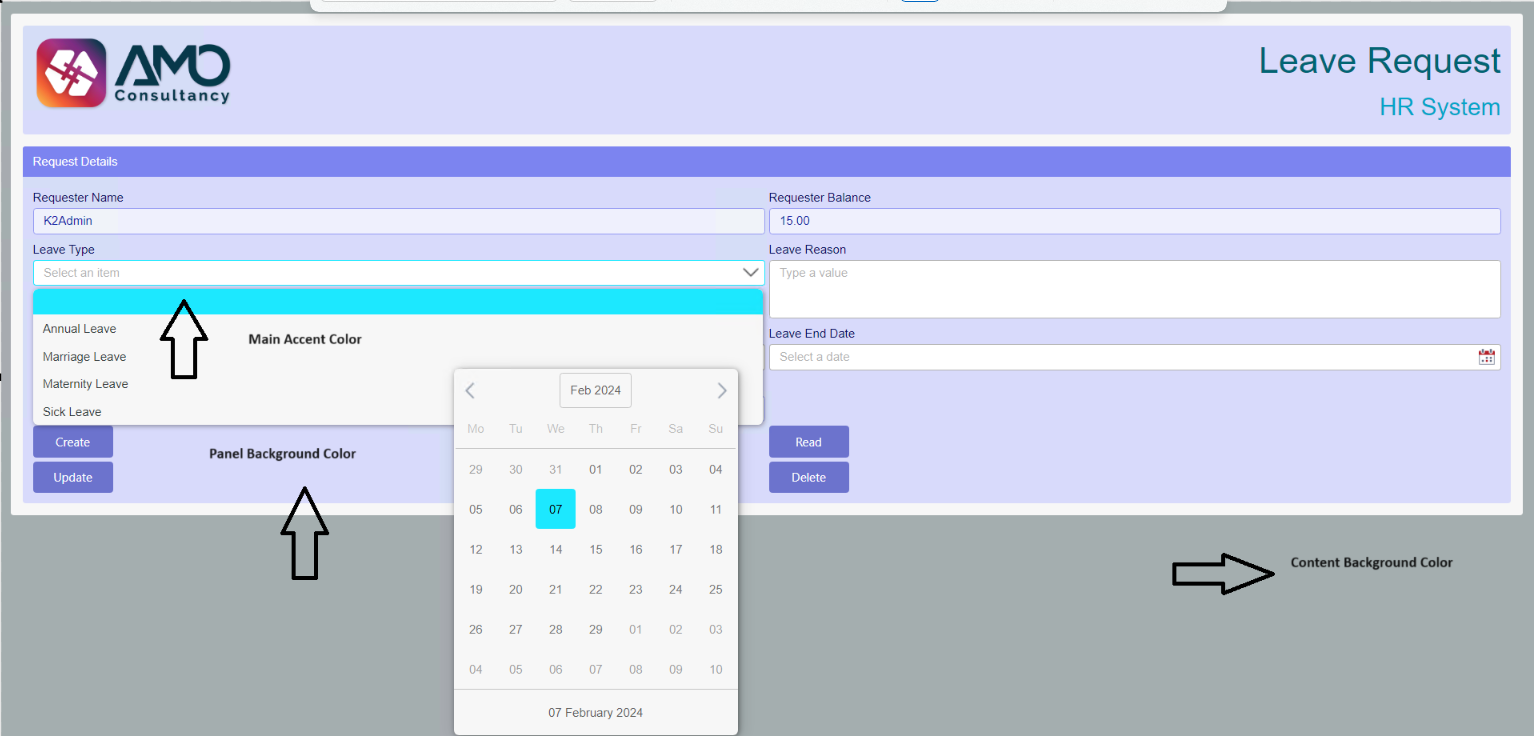
This colour represents the company’s colour identity. By clicking on number 2, a colour palette will open so you can specify the main colour.
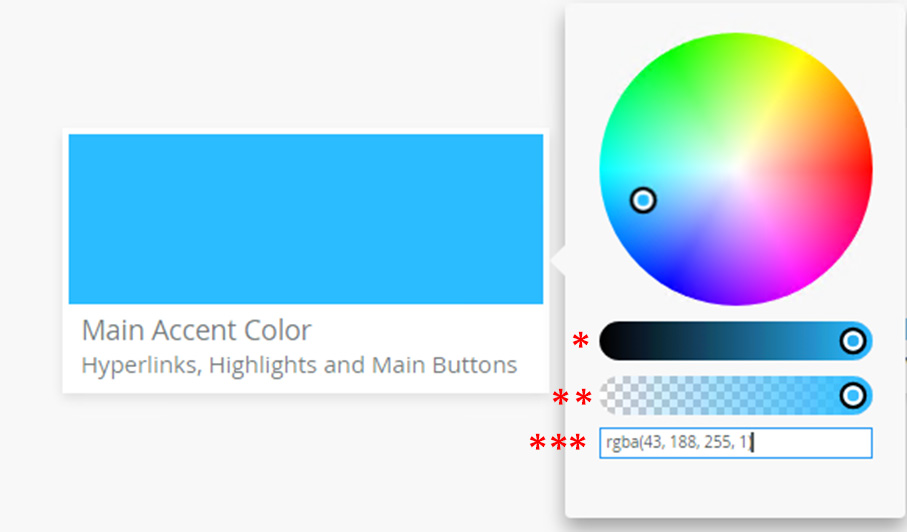
You can choose your preferred colour from the palette, change its transparency from slider (*), and change its brightness from slider (**). Or, you can directly put the colour name or its HEX, HEX8, RGB, RGBA, HSL, or HSLA value in the field below the colour wheel to specify a particular colour (***).
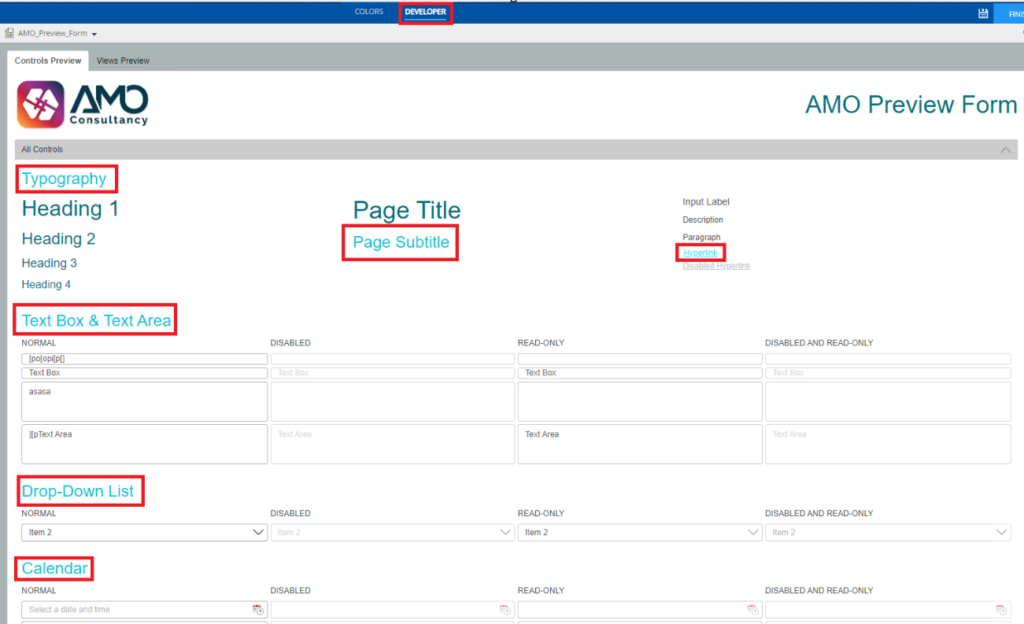
To check what controls are affected when changing the Main Accent Color, go to the Developer tab (only available from version K2 Five 5.6).
Now, we need to save the style profile and go to the form to add our newly created style.
From the form properties panel, you need to:

Run the form to see the changes you made to your Style Profile.
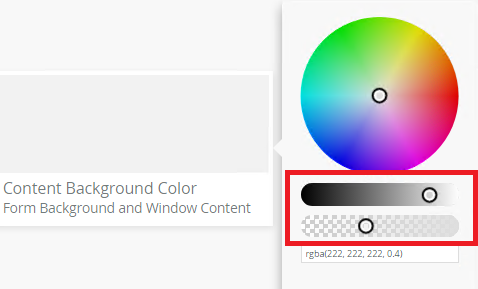
Changing this colour will affect your form background colour. To follow the best practices, it is better to keep this colour white and it is optional to change its brightness and saturation to make it more intense and darker than the custom white.
Now, the form will appear as follows:
In this section, we can customise the background colour of the views we have added to our form. To get a user-friendly look and feel, it is recommended to choose light colours.
After saving the changes, the form will be displayed as follows:
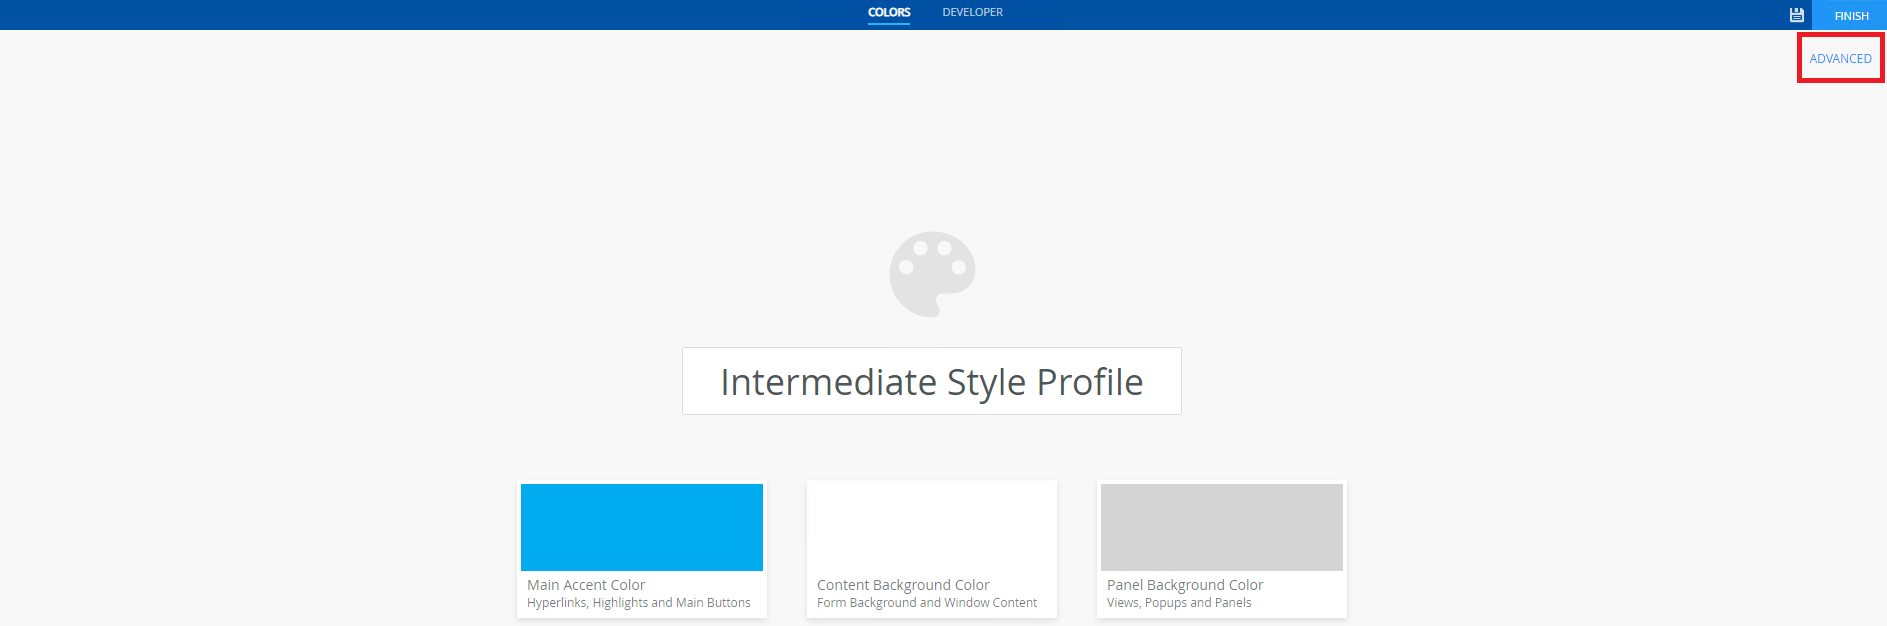
Now let’s move on to creating an Intermediate Style Profile.
To create an Intermediate Style Profile, we need to configure colours for each control. I will guide you through the process of customising the colours of labels, buttons, date pickers, and dropdown menus. Firstly, go to the style profile we have created and click on the Advanced link.
This will open a sidebar of all the elements of all controls that can be customised.
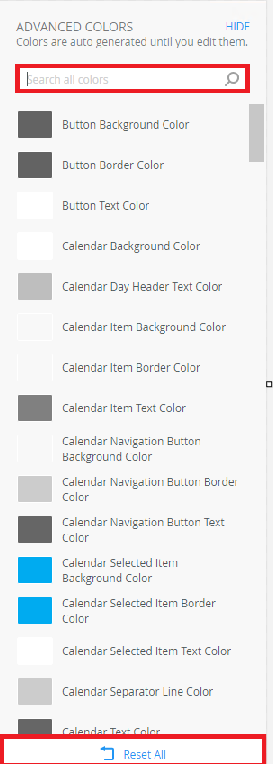
Type the name of the control you need to customise in the search box to get all its properties. Also, you can at any time Reset All the properties to drop all changes.
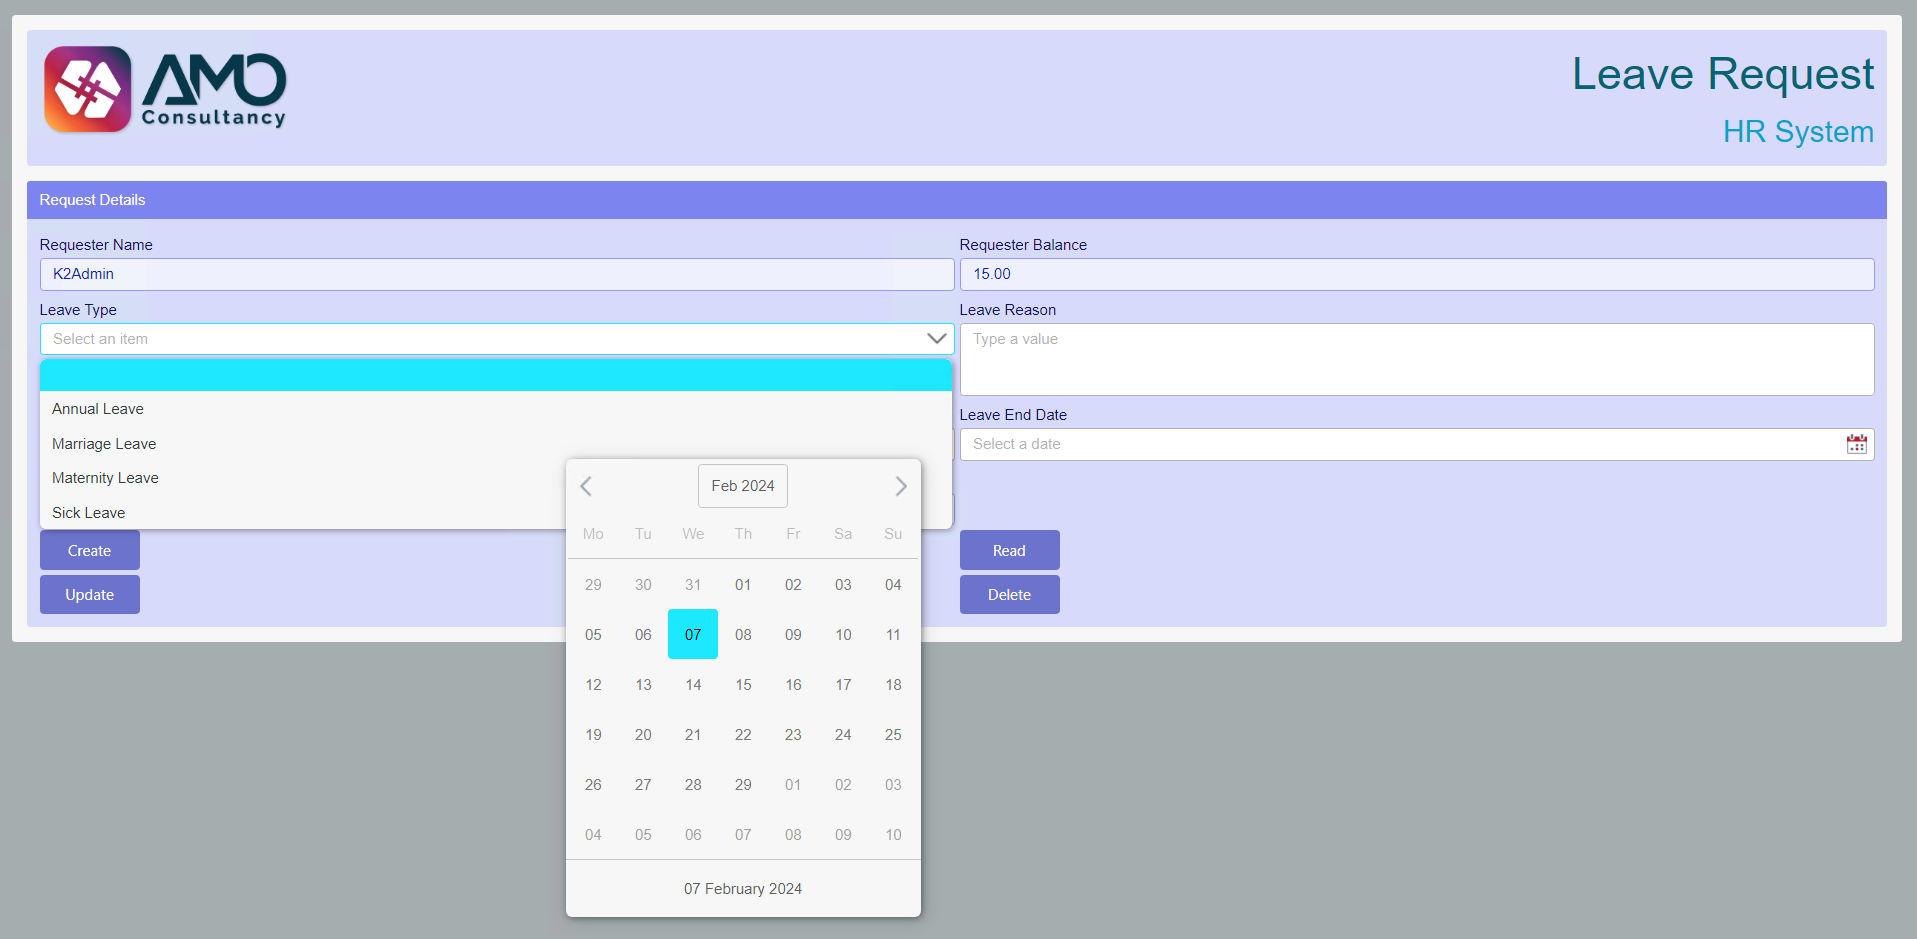
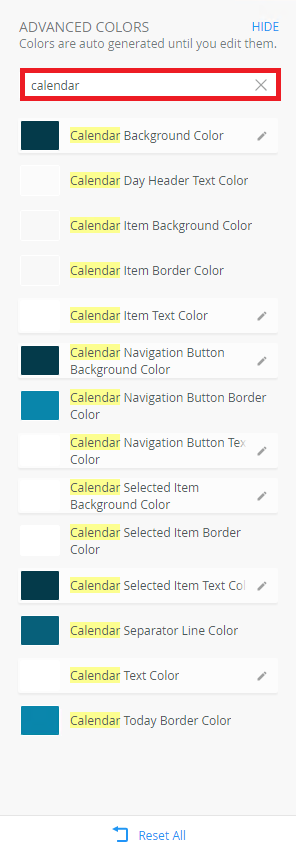
Type “Calendar” in the search box.
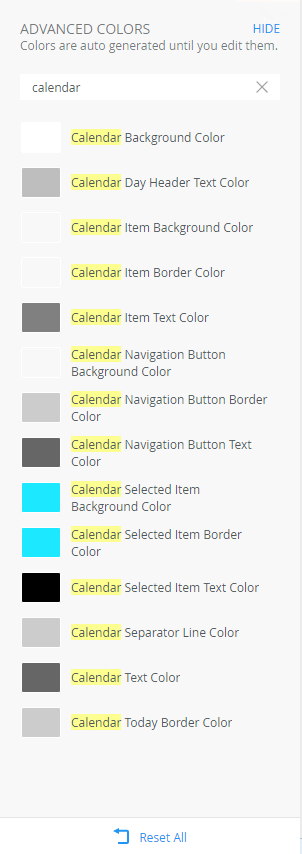
Now, we will apply the rgba colour code (4,58,74,1) to the properties: Calendar Background Color, Calendar Item Text Color, and Calendar Navigation Button Background Color. We will also set the Calendar Text Color to white.
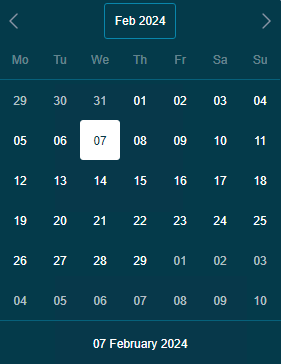
This is how the calendar controls will look after saving the changes.
Now, we are going to apply the colour code rgba(124, 44, 132, 1) to the Button Background Color property. Also, we will set the Button Border Color to rgba(4, 58, 74, 1).

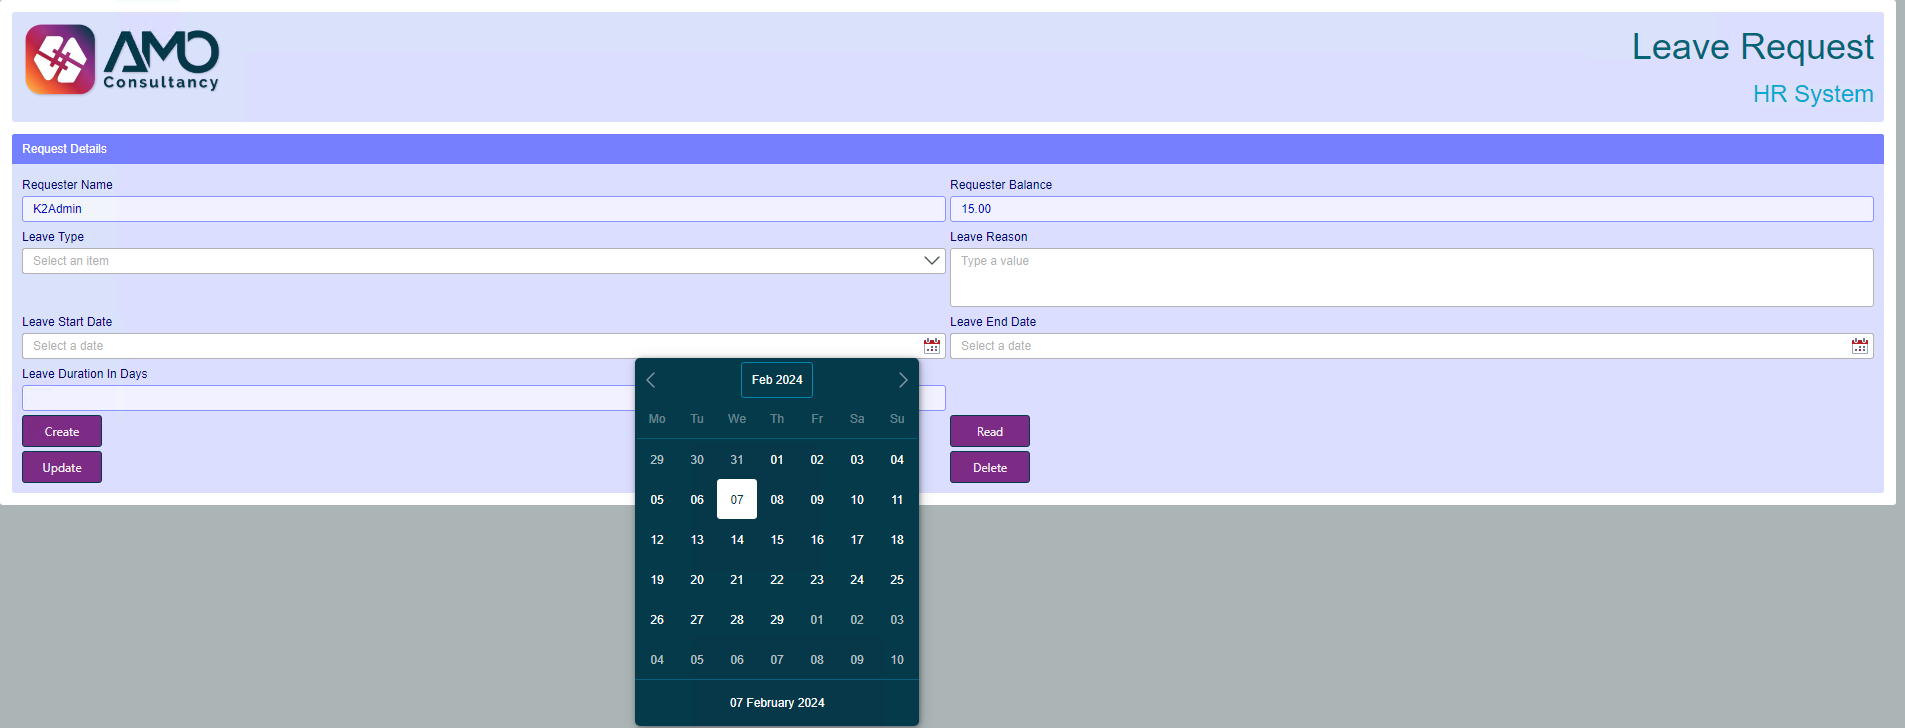
The form final result is shown below:
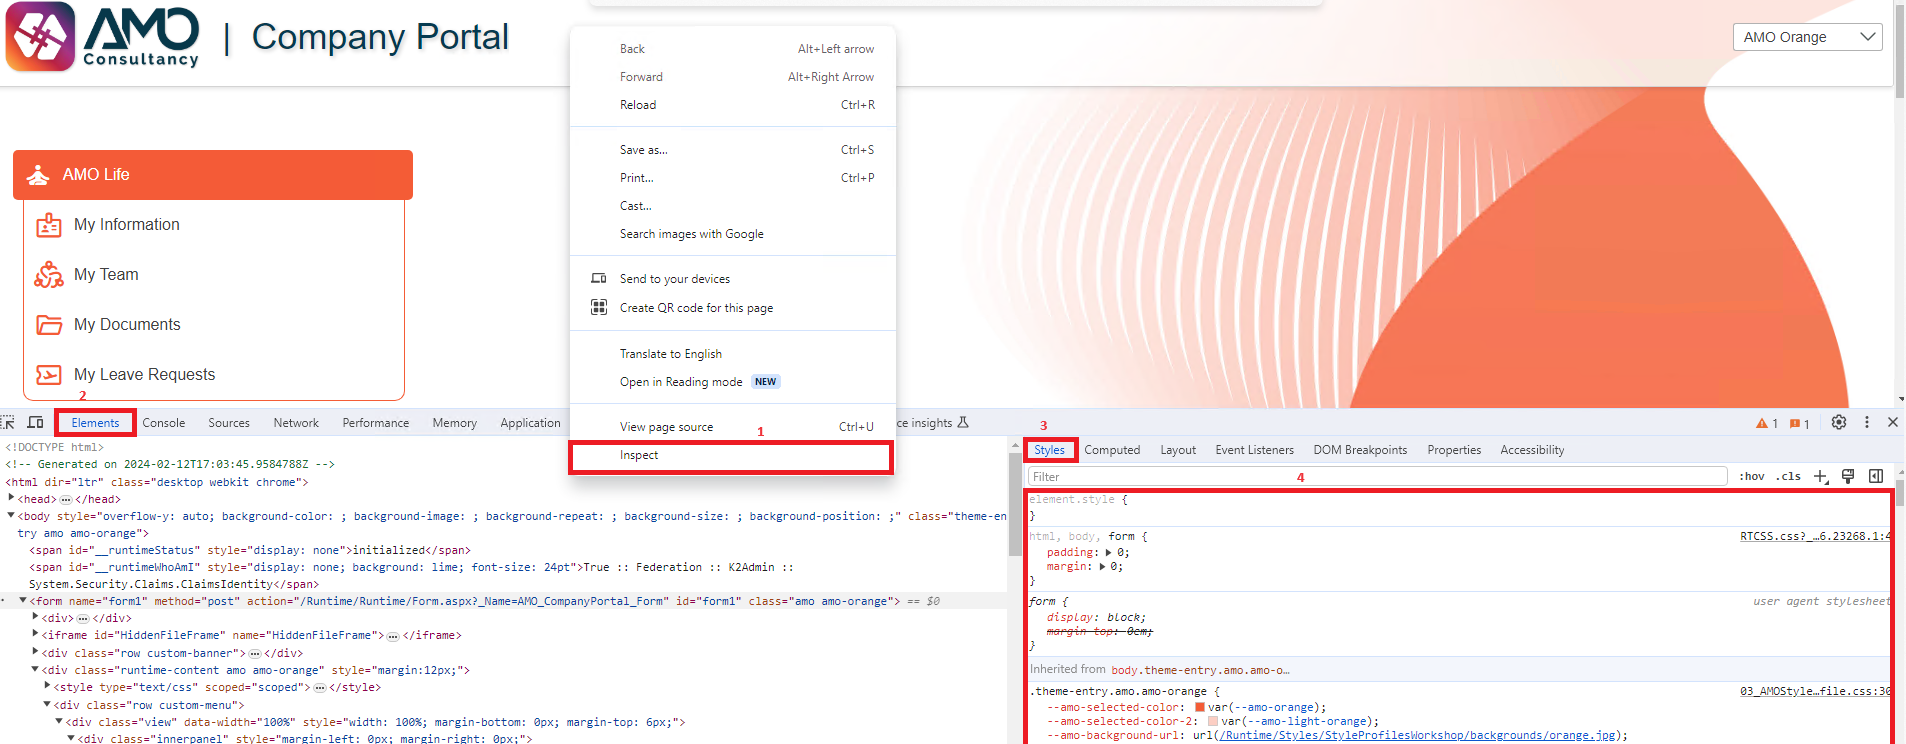
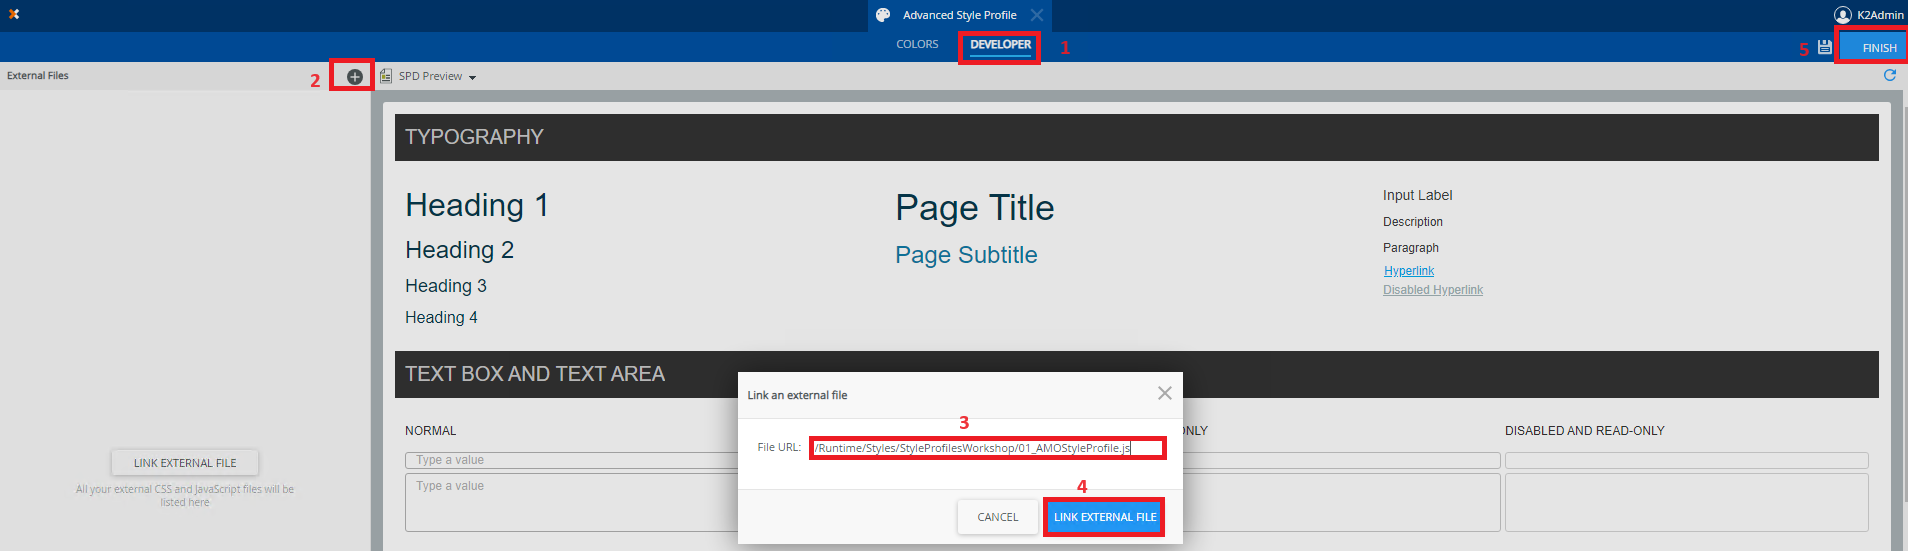
For advanced form customisation, Nintex K2 Style Profiles enables the use of customised external resources. Cascading Style Sheets (CSS) and JavaScript (JS) can be used. This enhances the look and feel of your style profile, and the optimisation of your web page behaviour.
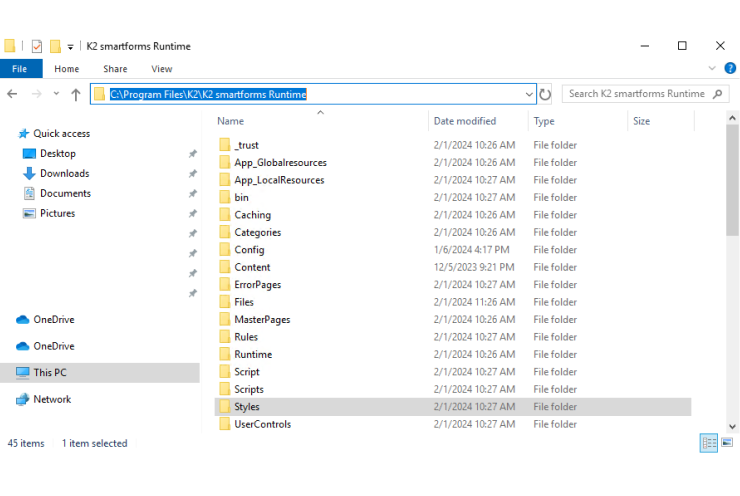
If you are using Nintex K2 Five (on-prem) and have server access, save CSS and JavaScript files in a custom folder. This folder should be created in K2 Smartforms Runtime.

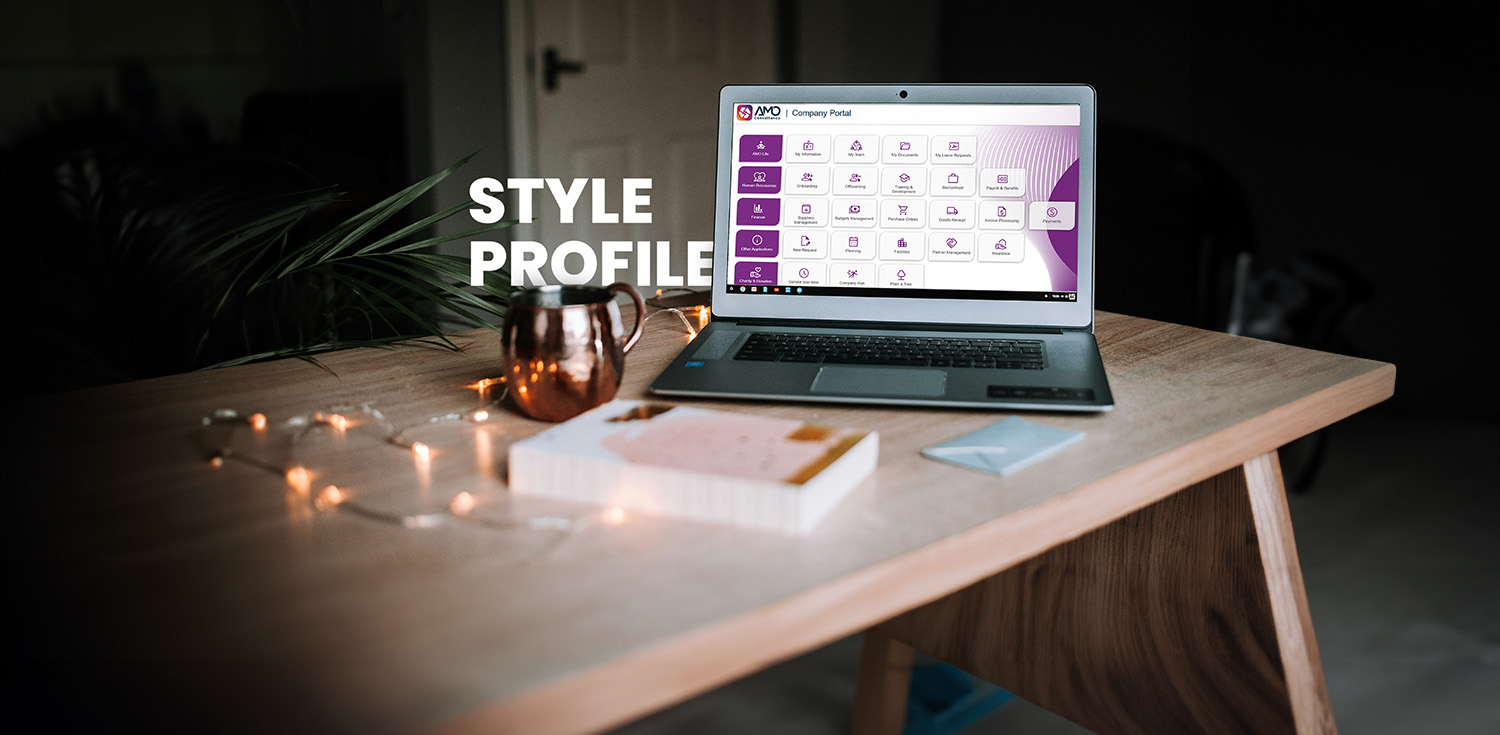
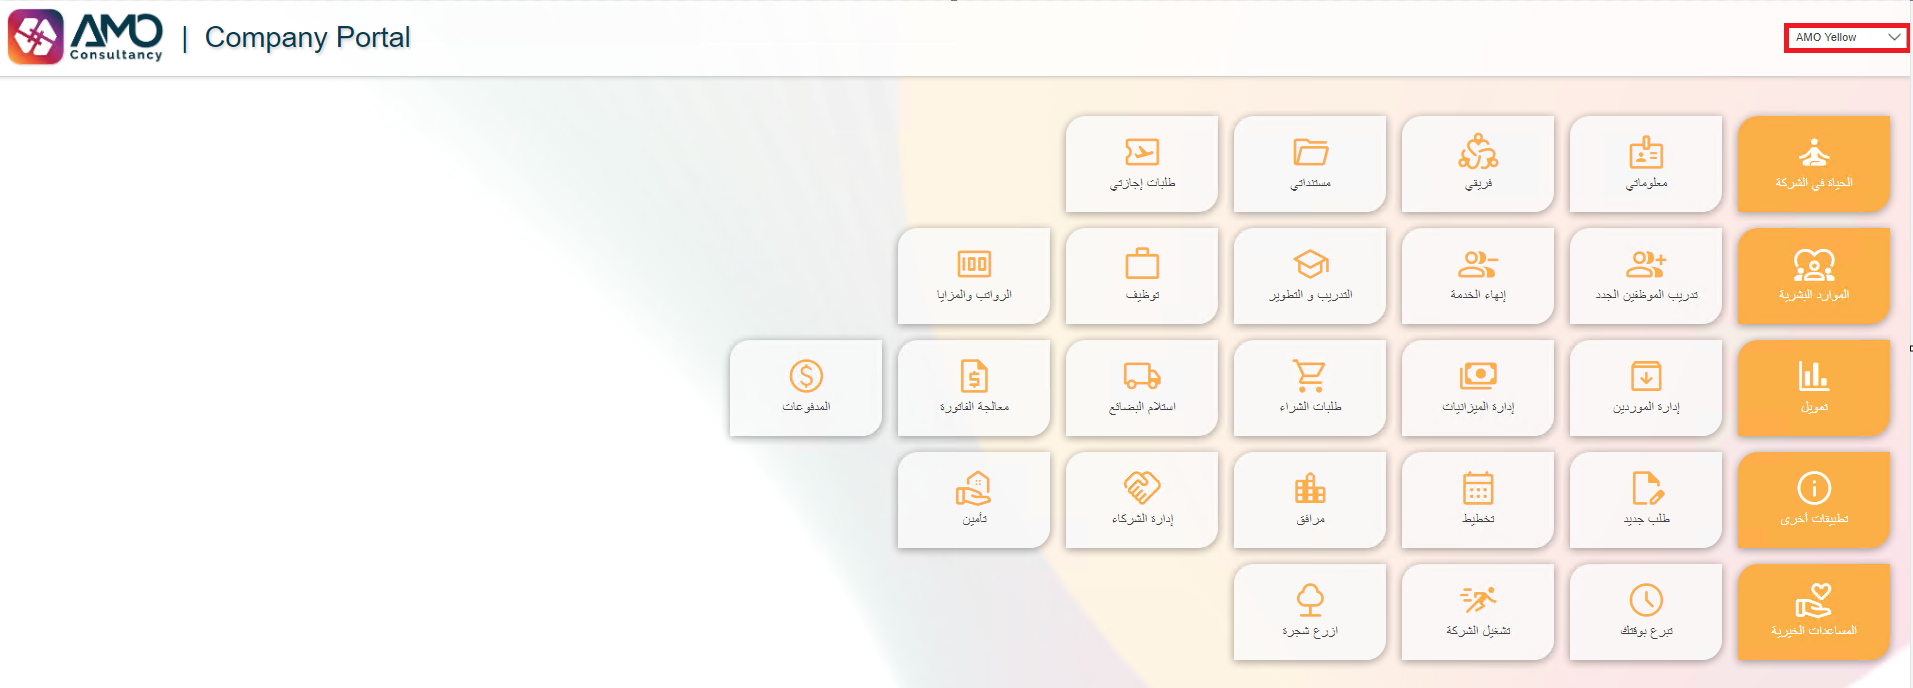
Here are the JavaScript and CSS files that we have used for the AMO portal – (a centralised portal that we developed that offers employees access to all applications and data) that could be handy for you.
By adding CSS customisations, you can enhance and modify the layout of your web pages. Additionally, with Advanced Style Profile you can go beyond just changing the colours, you can manipulate various elements in your forms, such as borders, font types, and sizes, background colours, etc…
Moreover, including JS customisations allows you to control how your web page behaves. This feature lets you create the code once and subsequently reuse it in any Smartforms using the specified style profile.
As a best practice, add our external files in this order – JavaScript file comes first, then split CSS sheets into 3 files.
01. AMOStyleProfile.js: this file is responsible for rendering the page and applying the chosen theme on the portal page.
02. AMOStyleProfileVariables.css: In this file, define every single property related to any control, view, or list used in our forms. Usually, we build this file by extracting the CSS properties of any K2 form by inspecting the web page. Then change the properties in that CSS, save it as a style sheet, and add it to your style profile.
03. AMOStyleProfile.css: In this file, we create our themes and apply our variables to each theme. This allows us to apply a different theme each time we change the dropdown selected value.
Note: You must add the relative URLs of your external files. The relative URL will look like: /Runtime/Styles/StyleProfilesWorkshop/01_AMOStyleProfile.js
Now, let’s have a look at some examples where we have configured our style profile and applied it to our solutions.
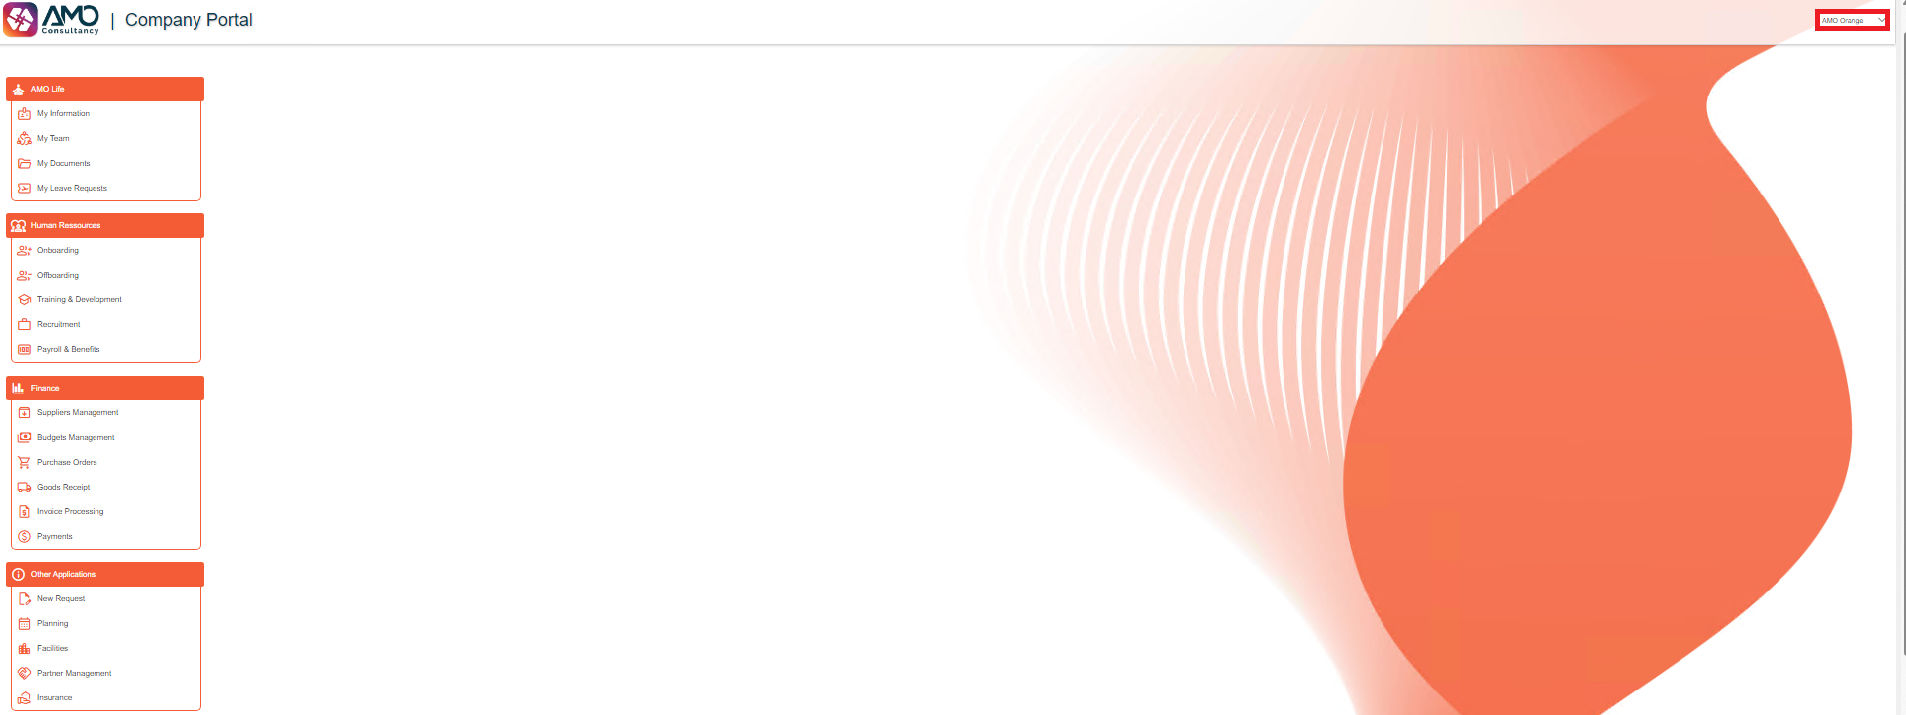
Case: Dynamic Portal
In this project, we’ve developed a dynamic portal that empowers our customers with the flexibility to customise the appearance and functionality of their main portal. They can effortlessly adjust the color scheme from a predefined dropdown menu, allowing them to tailor their experience to their preferences.
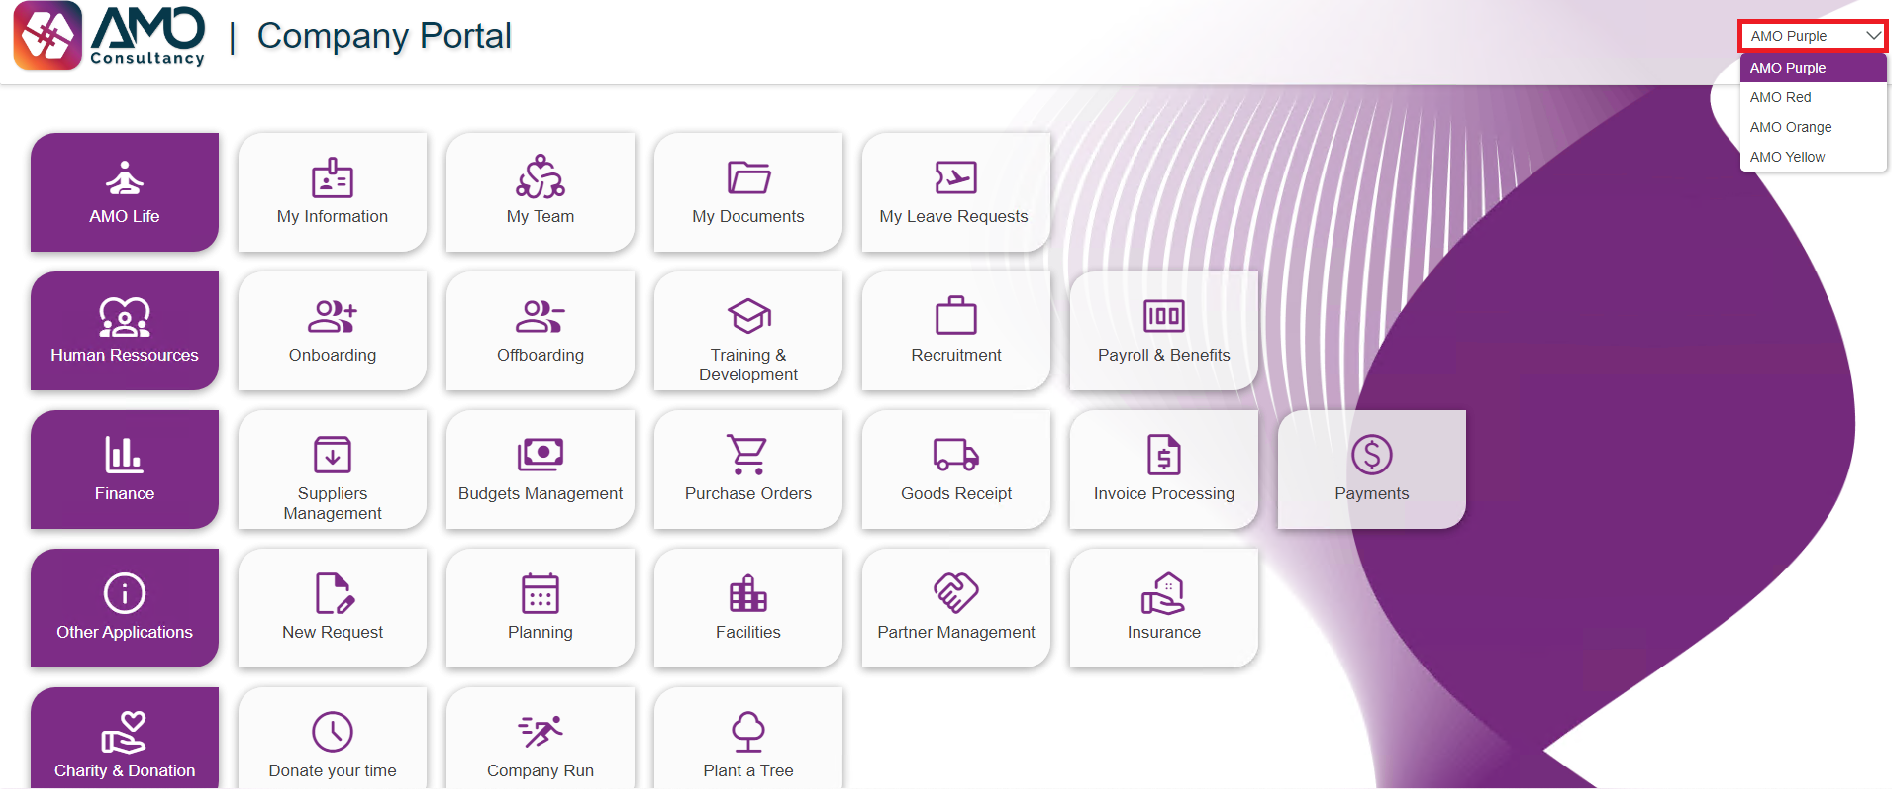
As you change the value of the dropdown, another style will be applied to your portal and forms. All these styles and render operations are defined in the style sheets (CSS and JavaScript files) you included in your style profile.
With the Nintex K2 Style Profile, you can also manage the transition between the languages in your forms, reports, and portal.
In conclusion, creating a basic style profile in Nintex K2 Five is a straightforward process. It allows you to customise the visual appearance of your applications with ease. Furthermore, by defining colours, you can achieve consistency and coherence across your applications while reflecting your brand identity or design preferences with no need for any coding skills. With style profiles, you have the flexibility to tailor the user experience to meet the unique requirements of your organisation or project, enhancing usability and aesthetics in the process. Hence, start leveraging style profiles in Nintex K2 Five today to elevate the design of your applications and leave an amazing impression on your users.
Need any advice or help with using Style Profile? Get in touch with our team!